


Rapid Prototyping - How to test your idea with click dummies
When we get started on a new SaaS product, we don't just code into the void and hope that we'll end up with a great new product. The first steps of a new product usually involve no code at all. Actually, everything starts with a sketch. With a click dummy.
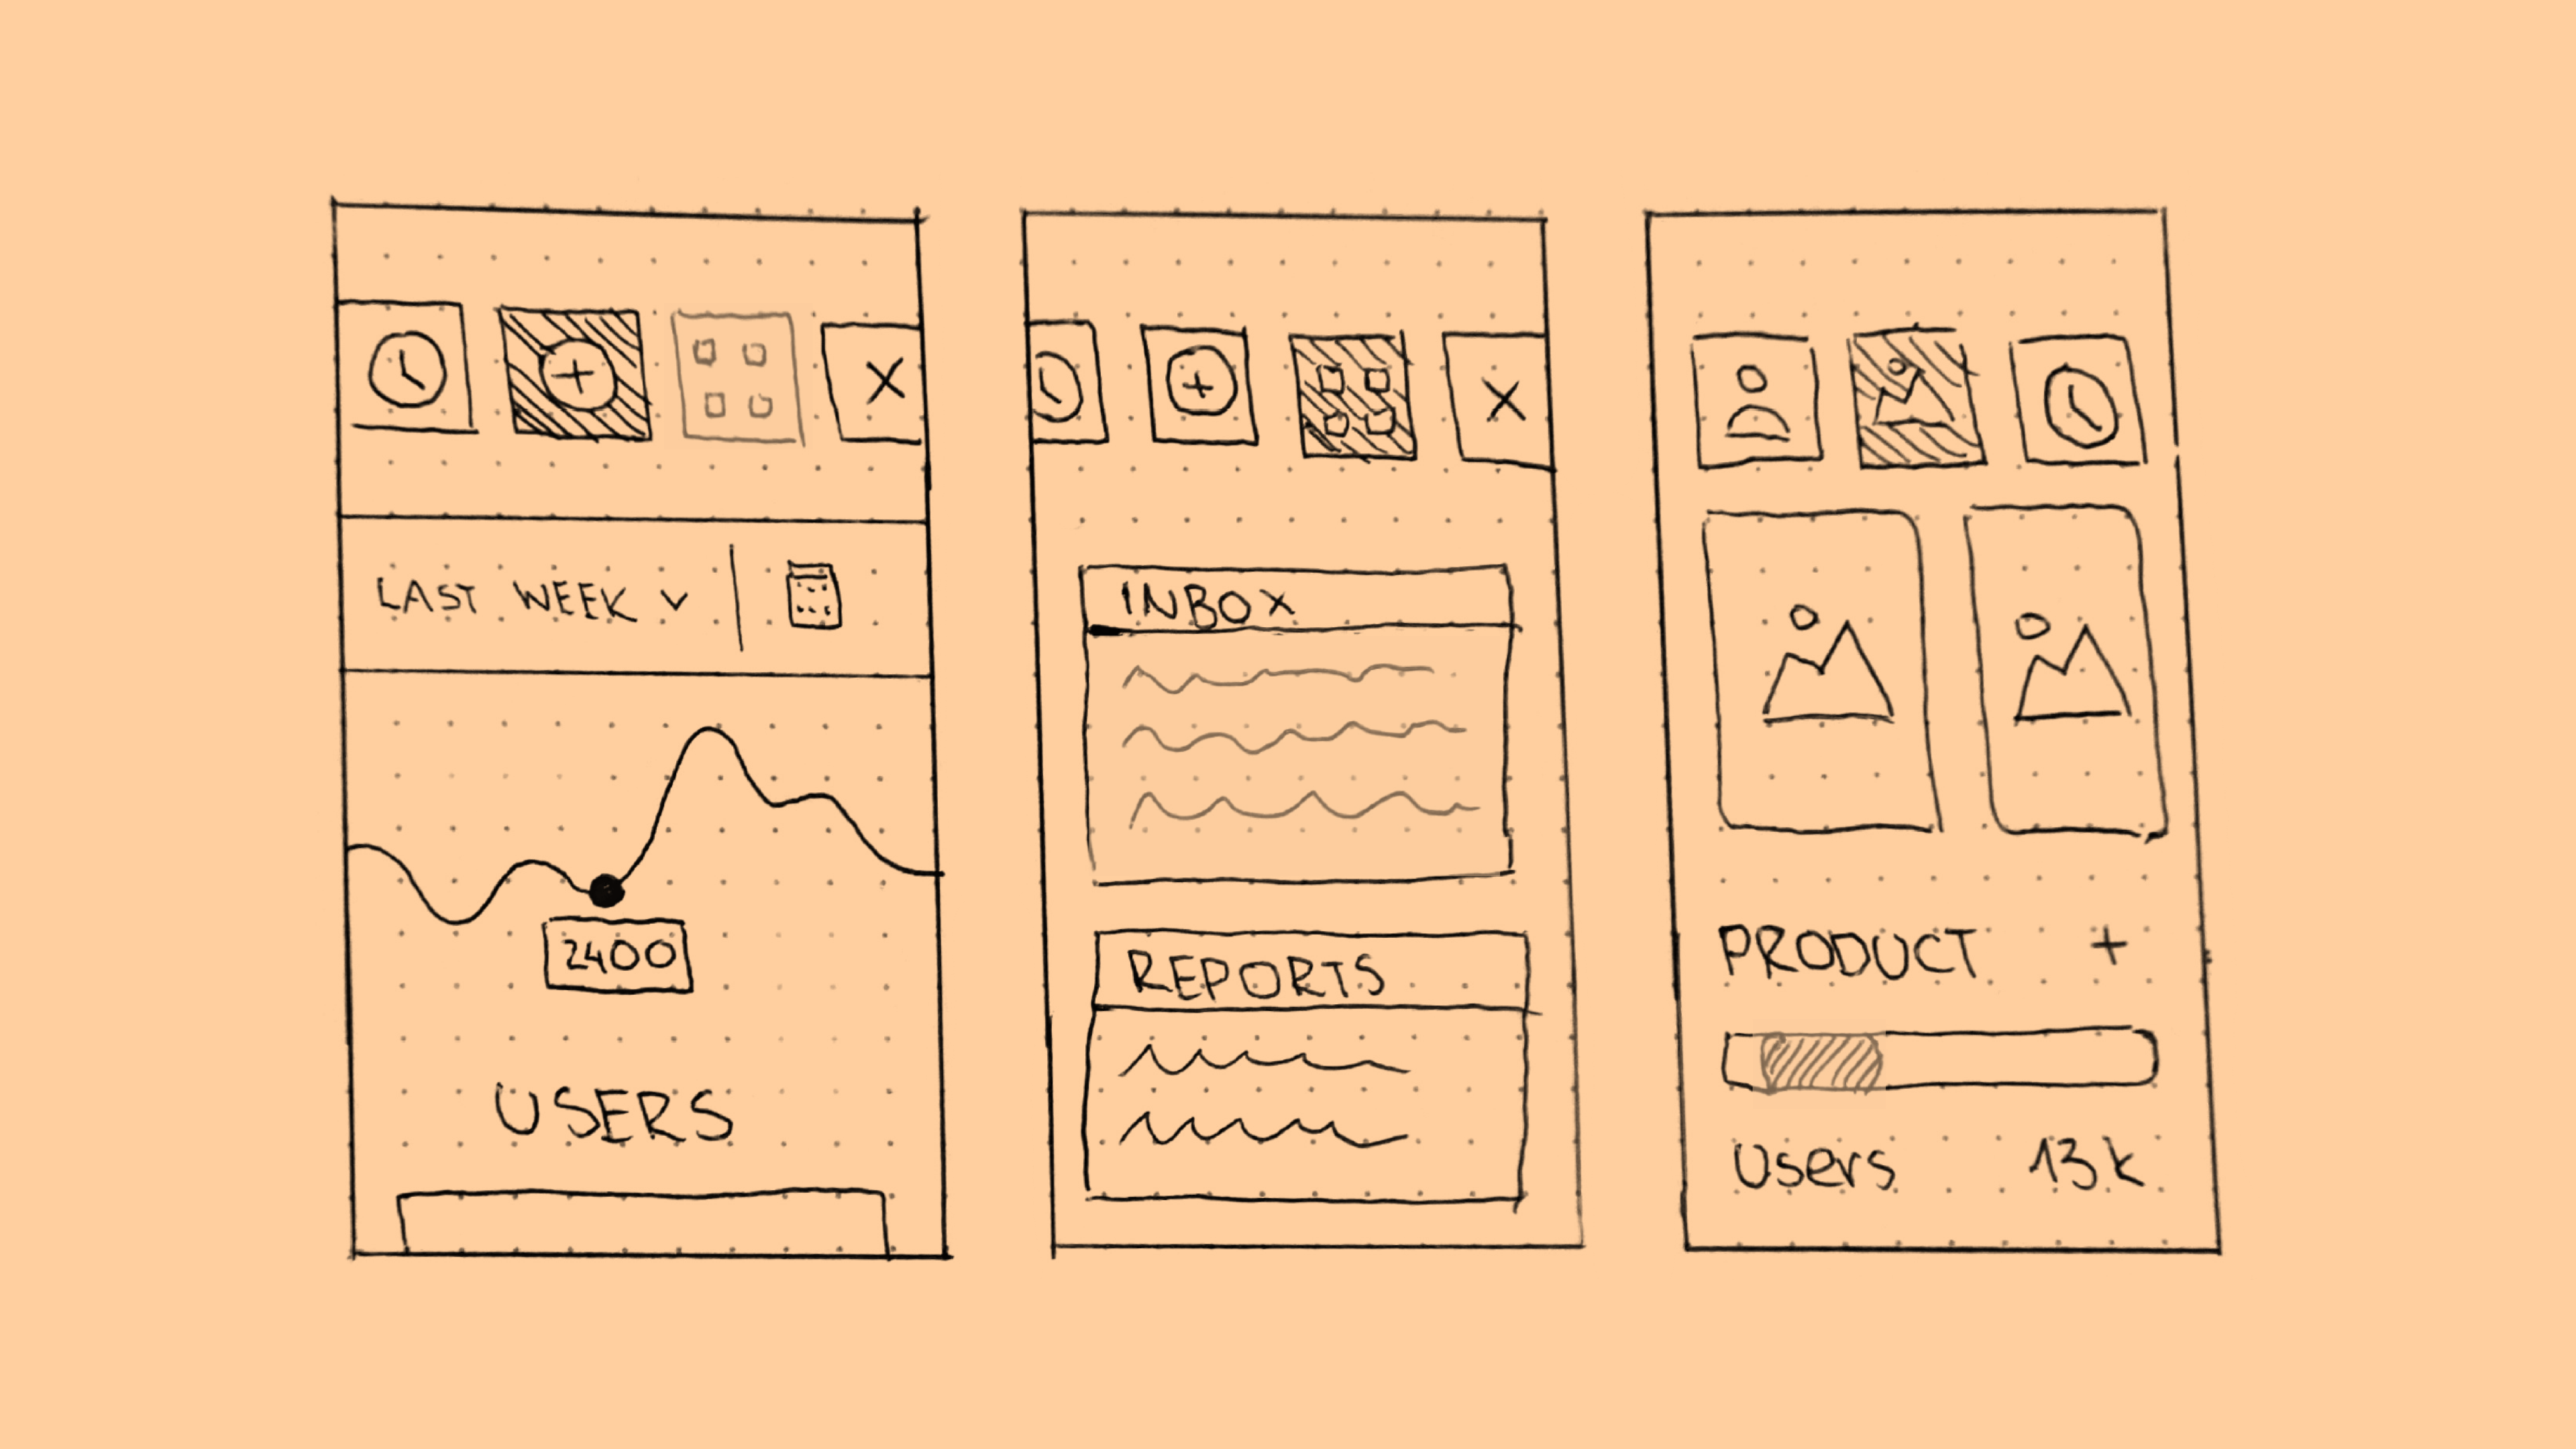
Click dummies are exactly what they sound like. They are design prototypes of our product idea that we can use to test how people would interact with it. Basically a drawing of an interface to simulate a real app.
But ... why?
But why do we start with a drawing like that? Why not just test a coded product right away? Wouldn't the results be much more accurate that way? That's true, but coding a product and only then testing it comes with two major drawbacks: Time and money.
Designing a product, coding it, and then testing it costs a lot more time and money. And even more so if you don't realise until after the development work is done that you've made big mistakes that then have to be re-implemented.
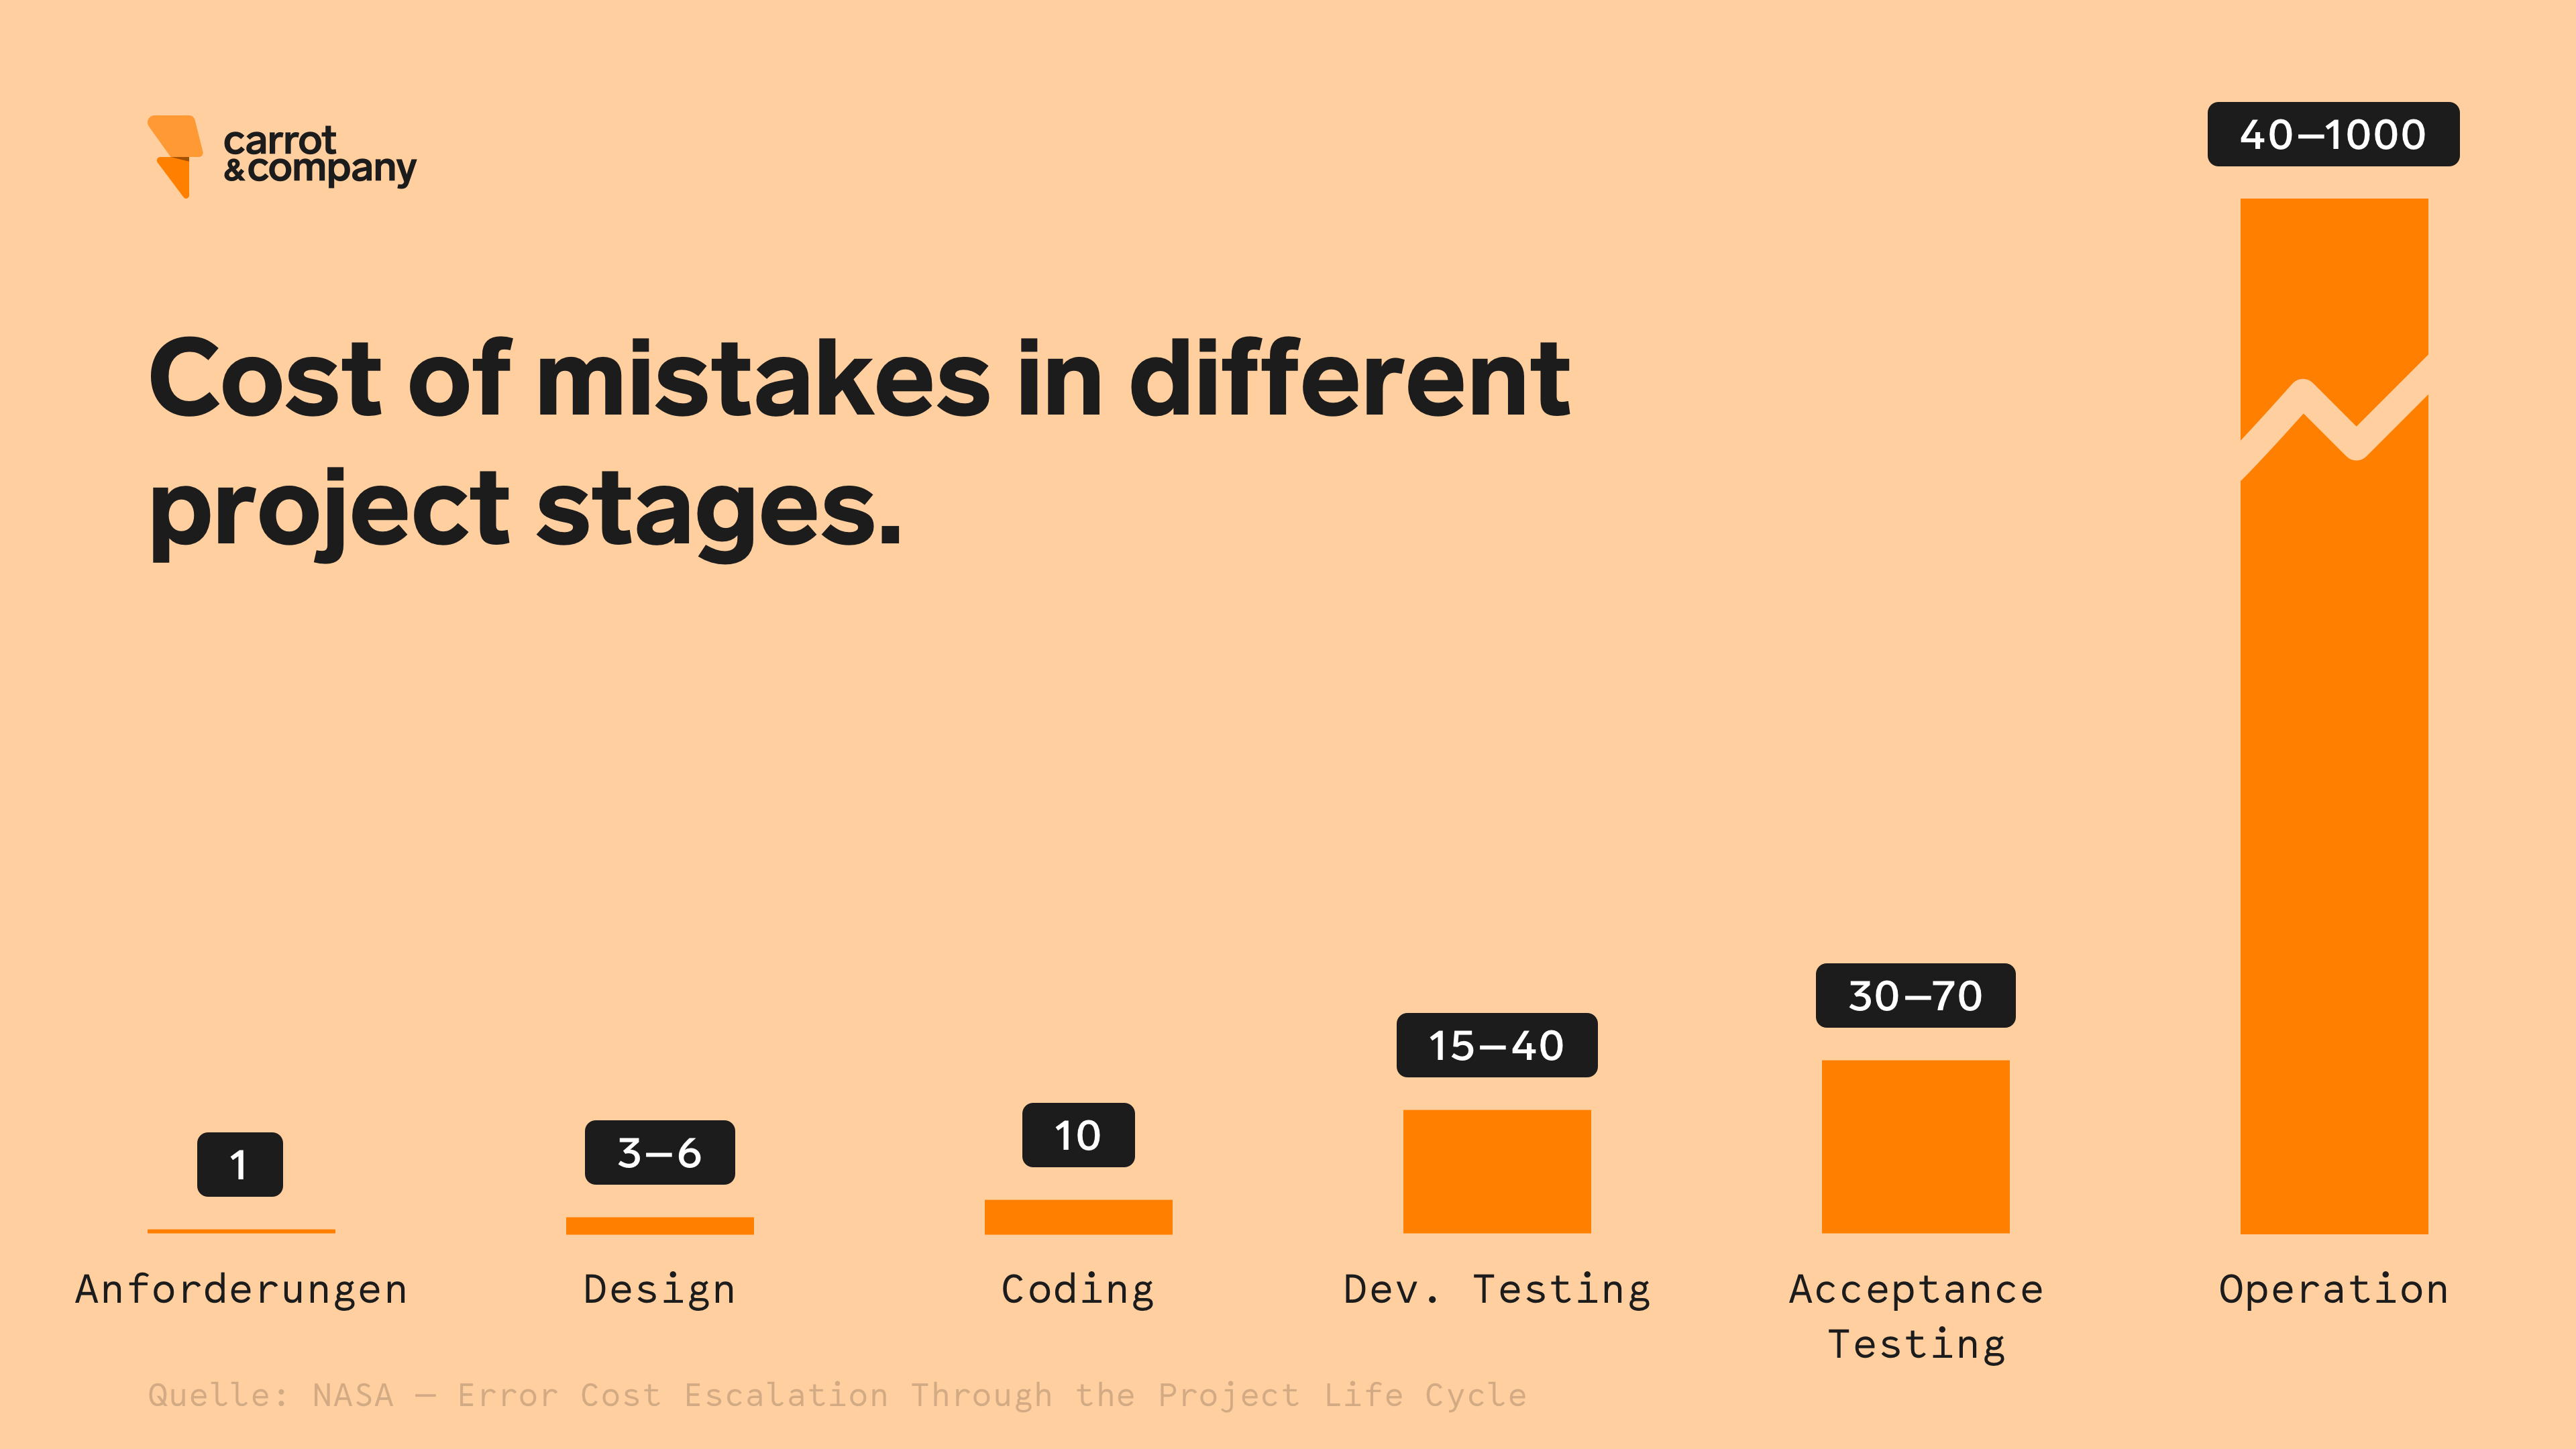
Aside from the savings, quick prototypes help you find a different perspective on the product, find solutions and evaluate the progress. Simply put, it's about making mistakes as early as possible, learning, and starting as effectively as possible into the high-cost phase of product development.
Low or high fidelity?
Click dummies come in two flavours. Low fidelity and high fidelity. On the one hand, there are quick prototypes without design, with simple shapes and little effort. On the other hand, there are those with more effort and real design, which are supposed to simulate the finished product. Both have their merits.
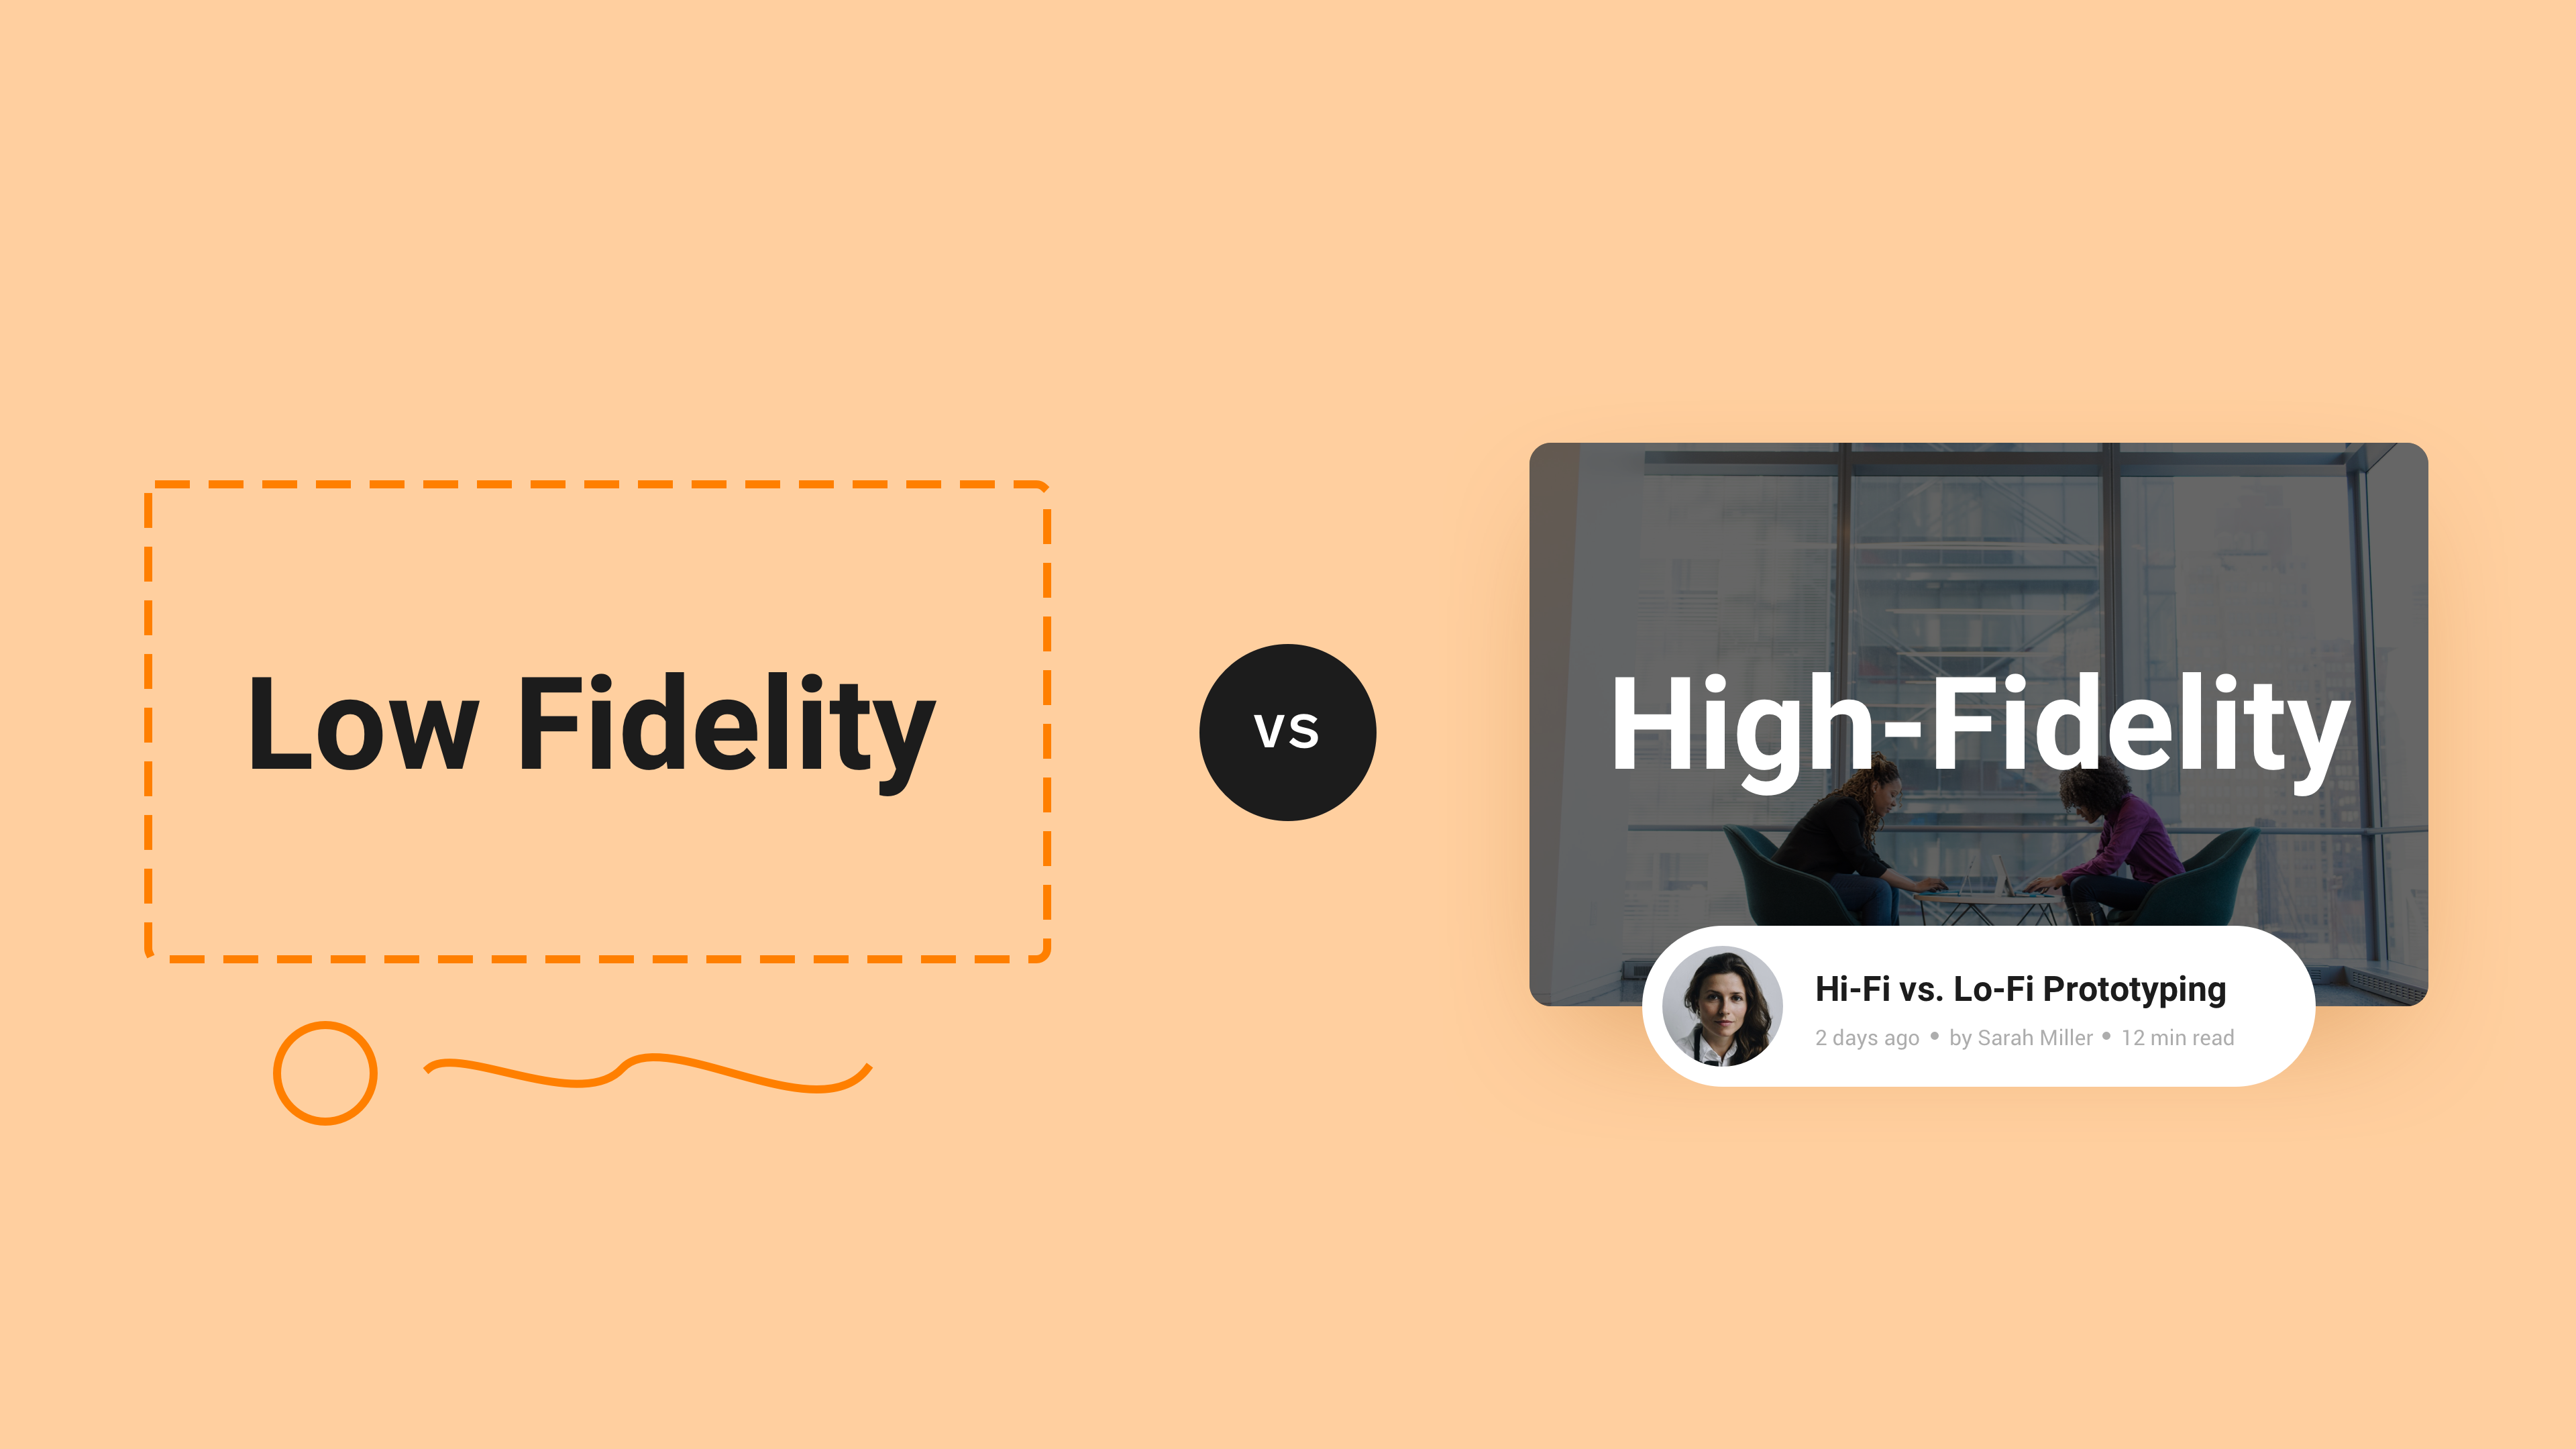
Low-fidelity prototypes include clickable wireframes and paper prototypes. They're perfect for making initial ideas and concepts tangible and testing them. They're also a good exercise in teamwork. But in return the final design is missing, of course, interactivity is severely limited, and testing can be uncertain.
High-fidelity prototypes are created with prototyping tools or with actual code already in place. They are close to the final product and the interaction, content and design are already very realistic. Of course, this offers advantages for testing. But they are also more expensive, less flexible and often require prior knowledge of tools or code.
So which one should you choose? Our suggestion: Both. Only in different phases of development. With the simple prototype you can eliminate the really rough quirks at the beginning, with the elaborate one the details.
And how does it work now?
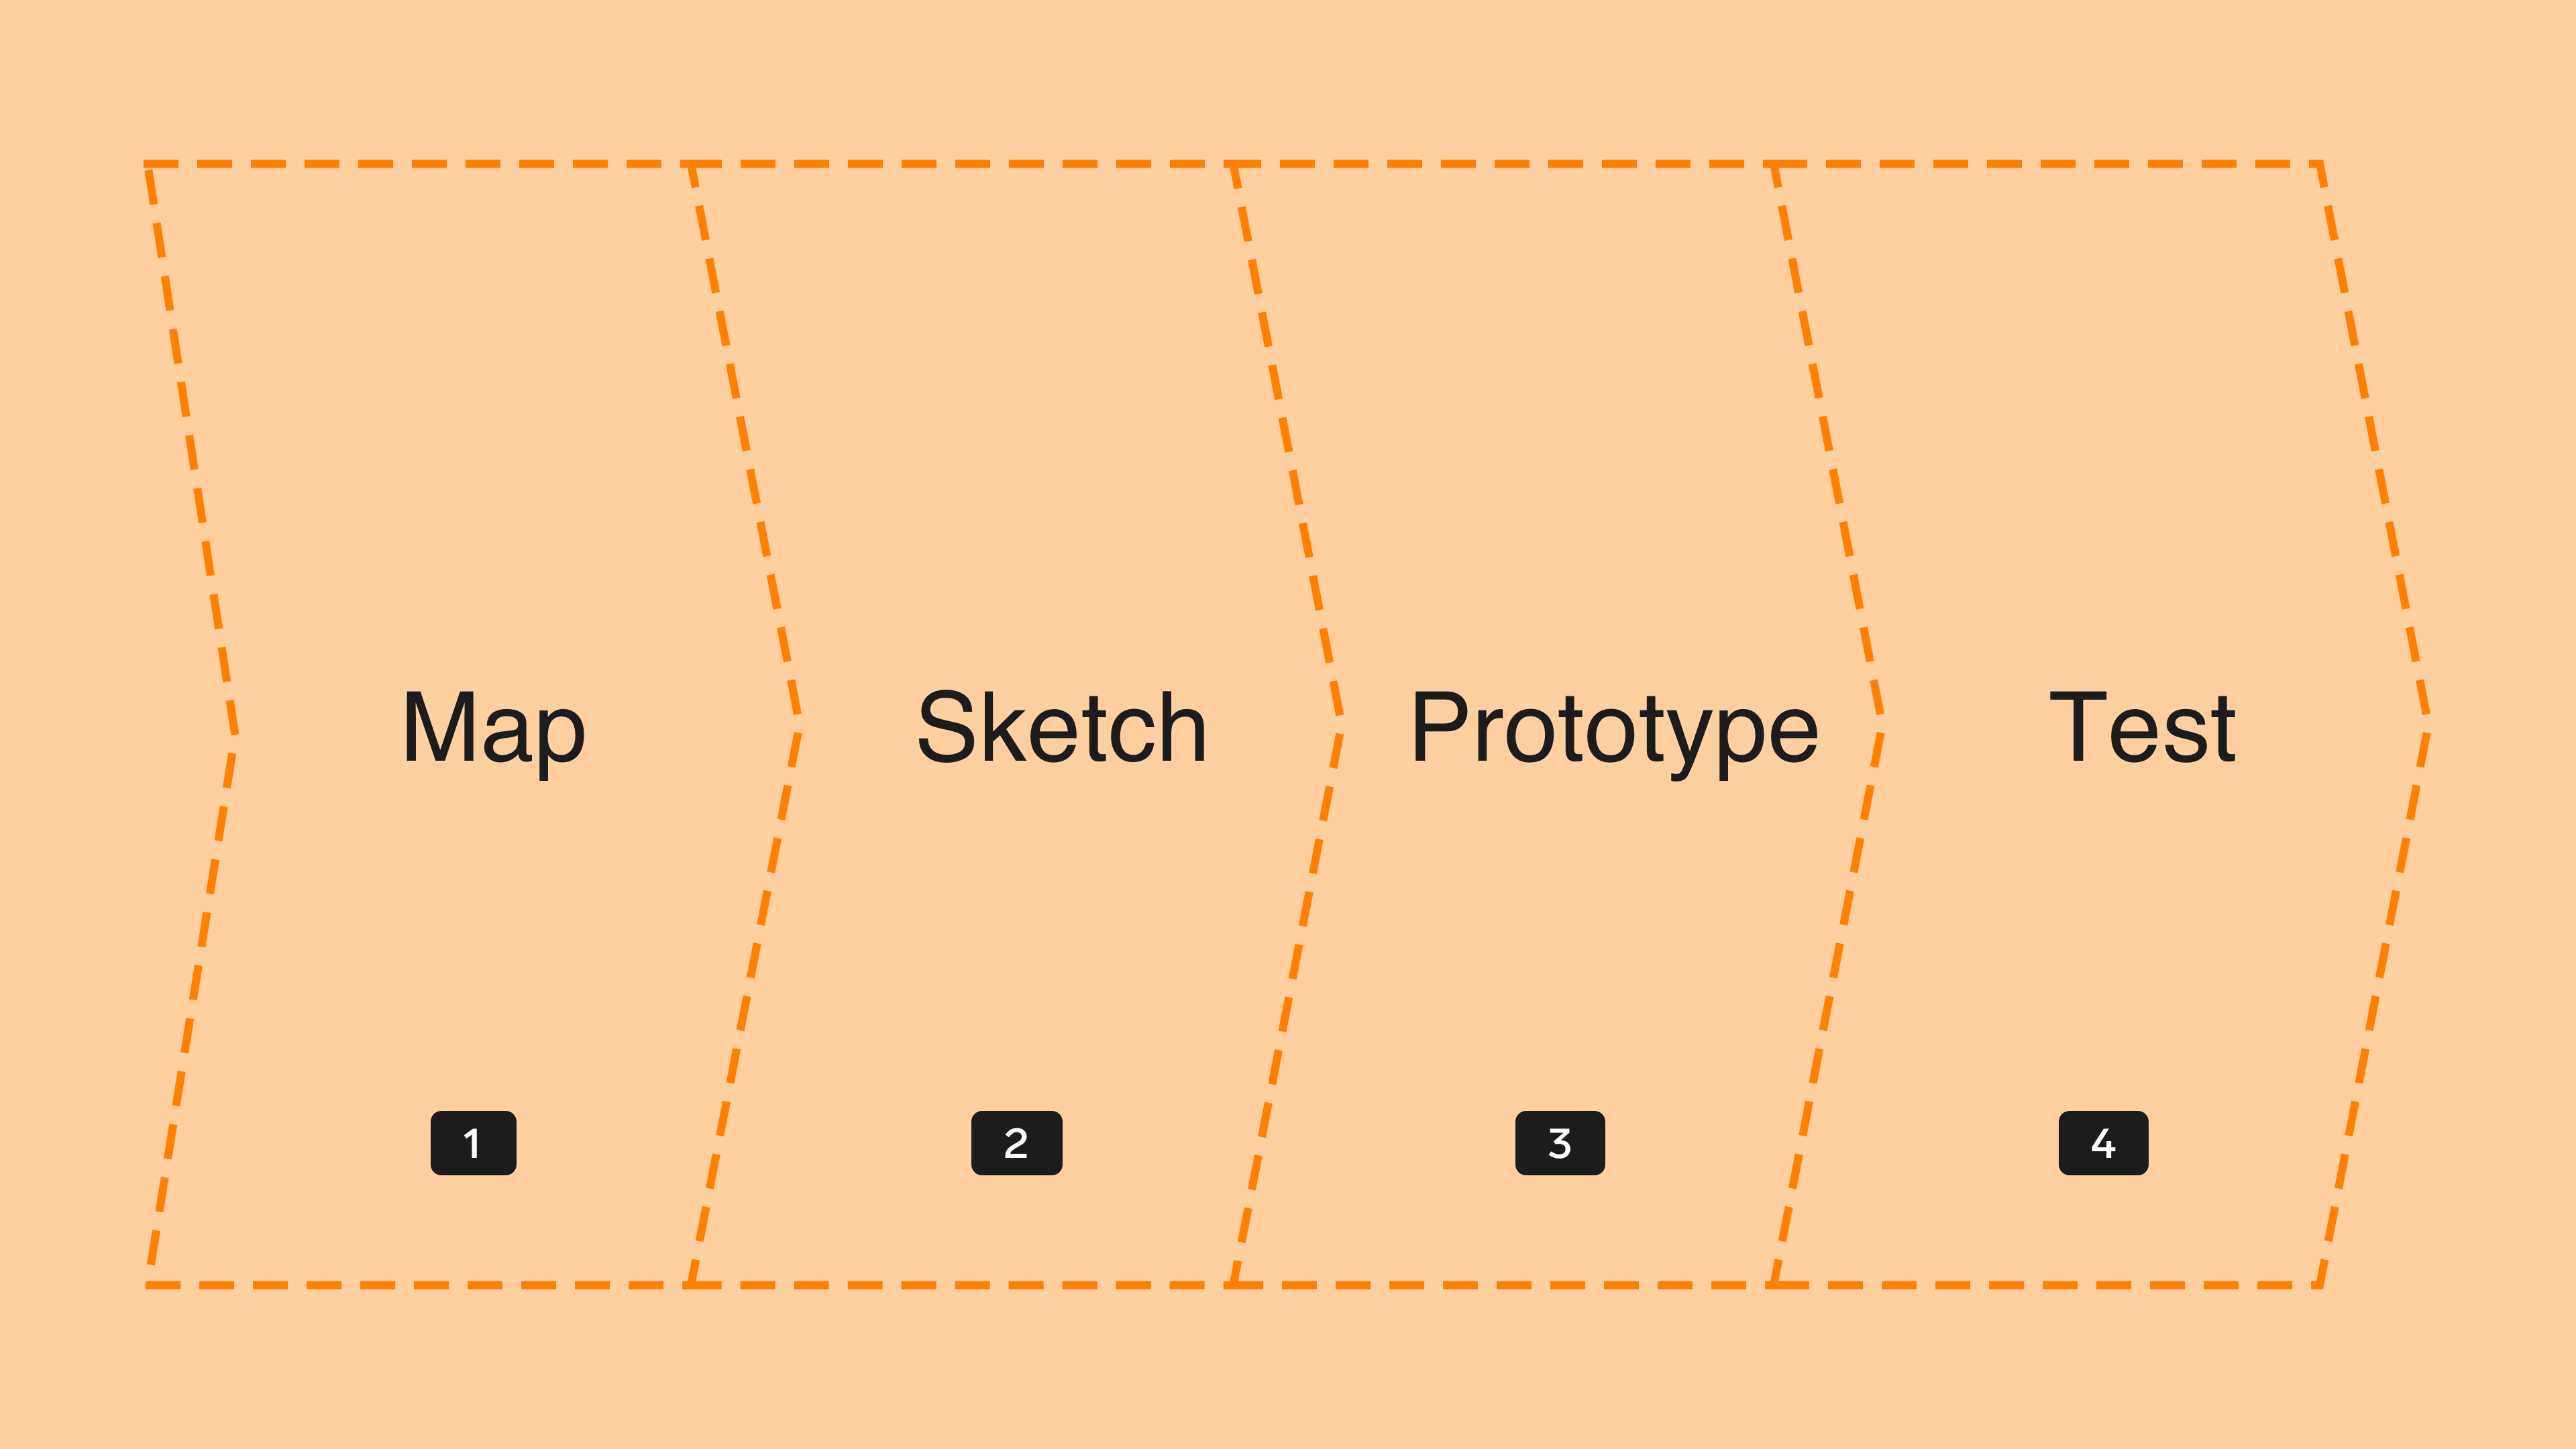
The way to the click dummy - at least to the simple one - isn't that long. There are really only four steps: Map, Sketch, Prototype, Test.
In the first step, you write down what your product needs and what people do with it when they interact with it. This is best done as a flowchart. Ask yourself the question: What does the person need to do to get a result?
Next, get down to the nitty gritty. Take your flow and sketch out all the screens your users need to get to their goal. Either by hand, or as simple wireframes in Figma or another software. How many you need depends on your product, of course.
A few basic rules and tips:
- Use as many and as few screens as necessary.
- Each screen must contain an action that leads to the next.
- Stay abstract. Use text and labels where necessary.
- Start with the first and last step and add the rest in between.
Once everything is recorded, it's time to prototype. There are several tools for this. Figma offers one, so does inVision, and the Marvel app can even build prototypes from hand-drawn sketches.
Test, test, test
Now all you have to do is test your click dummy. Of course, first yourself and in the team, but you should also put it in front of people who belong to your target group. After all, they are the ones who will have to work with it.
The best thing to do: explain to them what their goal is and let them figure out what they have to press and when. Also, let them comment on what they do themselves. If they don't understand something, that's a sign for you to change something.
Click dummies are no cure-all
Before you start scolding us: We obviously know that click dummies don't work for every product, and that you can't use them to test everything. Sometimes there's logic in the code that you just have to try with code to know if it even works.
And of course, click dummies have other limitations as well. They're not a finished product after all, and they won't guarantee success if you forgot market analysis, personas, branding etc. because of them. But they are a great first step on your way to a successful SaaS product.
If you need even more help with click dummies, prototyping and UX design of your product, check out our Academy. We offer a workshop all about click dummy prototyping, and we'd also love to help you get your product ready to launch.

